 General Information
Author:
Lutz Pietschker
Version: 2010-12-31
Paper Modelling | Home Page | Links | What's New
General Information
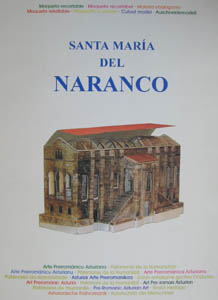
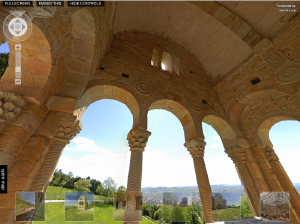
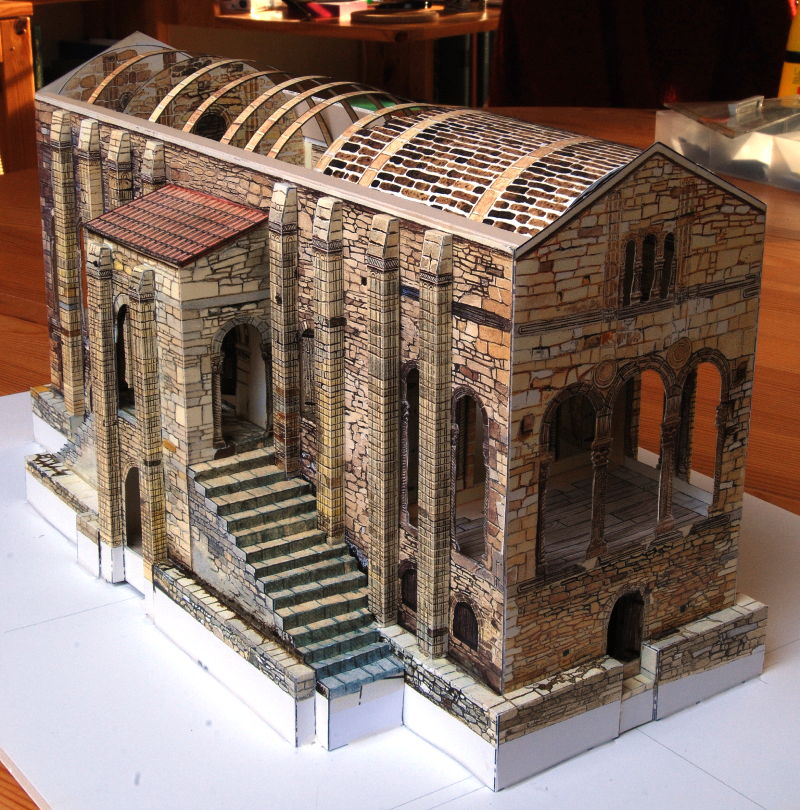
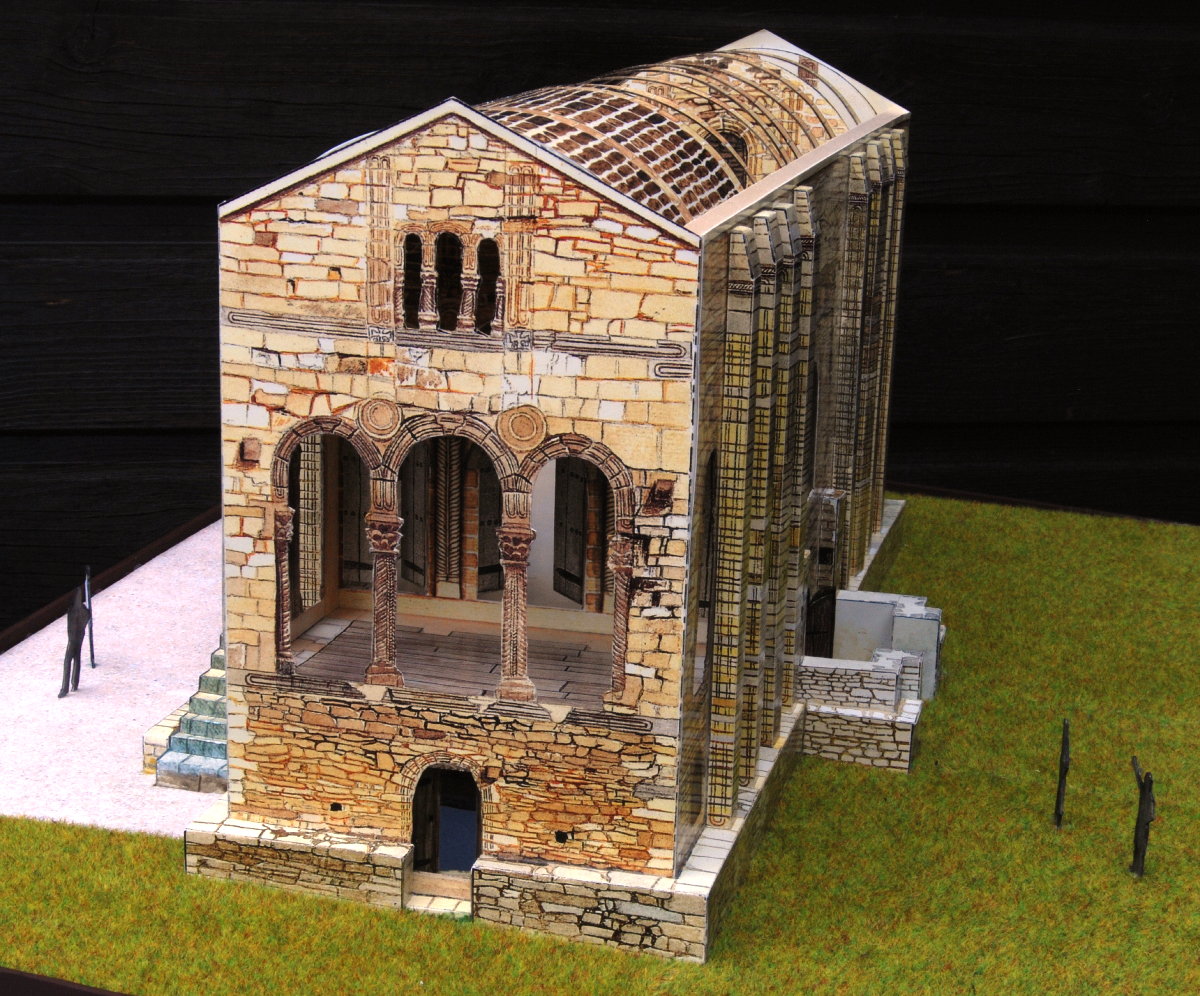
The model shows the church "Santa Maria del Naranco"; the name is taken from Monte Naranco near the town of Oviedo in North-West Spain on whose Southern slope the church was built in 848, i.e. in the 9th century. The original building is about 20 by 6 metres in size. In the historical reference section of this page you can read more about its history and also see what the actual building looks like. For starters, here is a beautiful interactive panoramic view (Flash player needed):
I bought this model because the description in a web shop appealed to me. It said "very beautiful colouring", I think, and that is certainly true. The artists have achieved a near-photorealistic effect with what I believe are aquarell colours. The graphics are wonderful indeed. Strangely, the contour lines of the parts are often printed in rough, absurdly wide lines (some of them more than 1mm wide), and some not even really straight (says my ruler). However, it is usually easy to find the correct cutting or scoring line, so fitting the parts is not a problem, and the overall graphic impression is magnificent. If you compare the model with the pictures of the original building you will appreciate how well the artists captured the details.
The designers are given as "Fiquin y Badiqui"; this seems to be their only cardboard model that is easily available. Behind these pen names is a couple of artists and illustrators who lived in Oviedo, Asturias. In 2009 the sad news reached me that the wife, Badiqui, had died and that Fiquin has moved into the country.
Fiquin y Badiqui are no professional model designers, which explains that the construction that is sometimes unusual, done in what you might call "origami-3D-puzzle-style", but please do not read this as criticism: The result of their efforts is one of the most enjoyable models I ever built. But if you are going to build it please be aware that it requires some thinking to do it right, and some decisions where to deviate from the printed instructions. Some parts of the edition I have are outright wrong, in particular when it comes to the northern staircase annexe.
The model is printed on glossy cardboard that is heavy and what feels to have a "flowing" quality, somewhat similar to vinyl sheets. It can be cut very easily and precisely and also is easy to form, but offers some resistance to precise folding. However, once folded or formed, it keeps the form very well indeed. Colouring white space with aquarell colours was no problem at all.
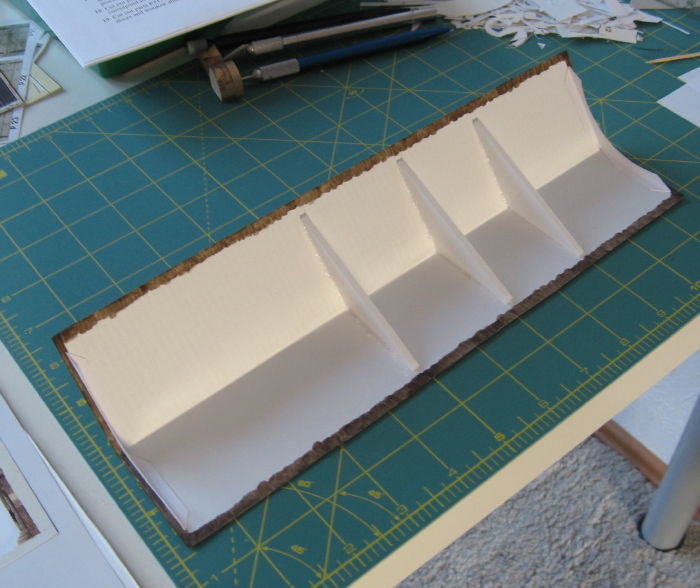
The model comes without a printed base and actually this is one of the models where the base would hide details that you may want to see later. I added a "KAPA" cardboard-foam sandwich board as the base, with cut-out holes so that the ground floor interior of the model can still be seen. The model also shows some whitespace along the bottom, indicating how the building is set into the sloping ground of Monte Naranco.
More about the model in the Hints and Translation section, below; first take a look at some pictures of the model; the pictures show the progress of the construction as well as the end result.

|
|
Unfortunately, I have no images of the very first stages of my construction progress- building stretched from 2007 to 2009 because I had to stop working on the model for personal reasons.
Here you see the improved roof construction. The middle "rafters" are made of 3 mm KAPA board, the outer ones of simple cardboard. As it turned out, it would have been even better to strengthen the roof itself by an additional layer of cardboard, and to to the improving after the building itself was done. |
|

|
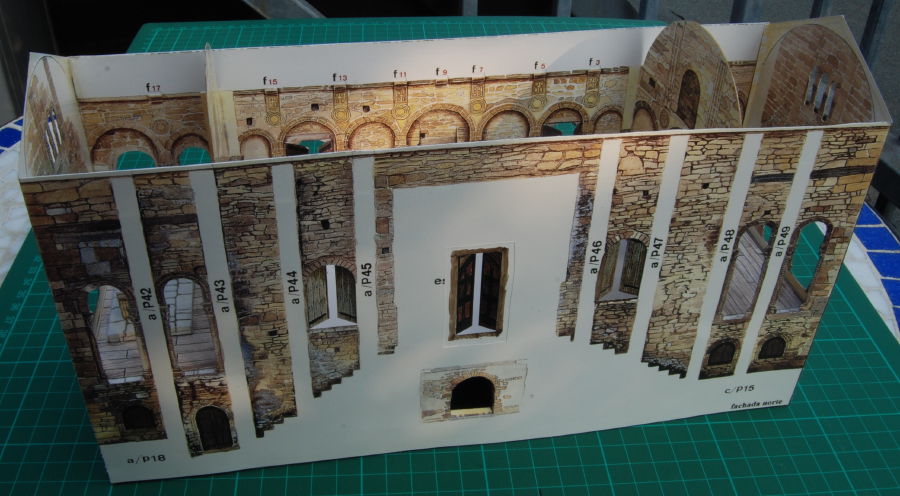
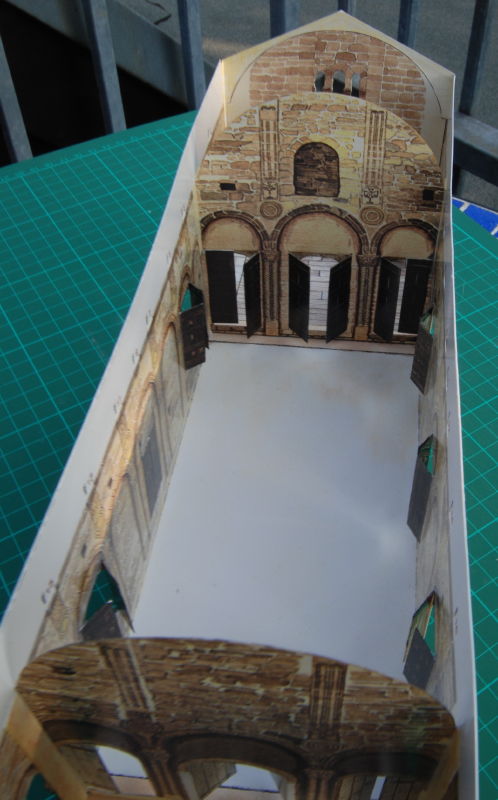
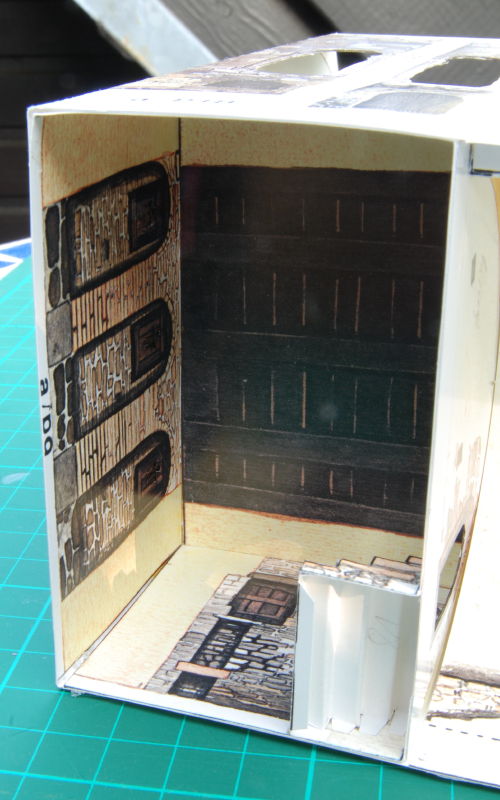
The main building, the interior complete except for the vault construction. On the right-hand picture you can see the altar room. Below it are the bath window shutters. |
|
|
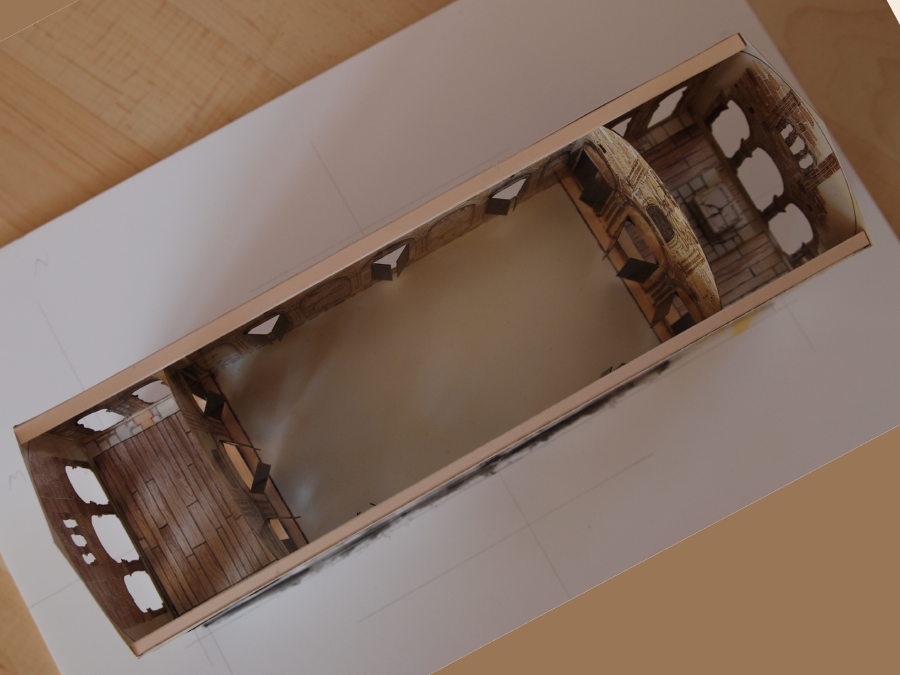
Top views of the main hall and of the altar room. Note the slightly curved eaves on the long walls, this is why I later reinforced them (see below). |

|
|
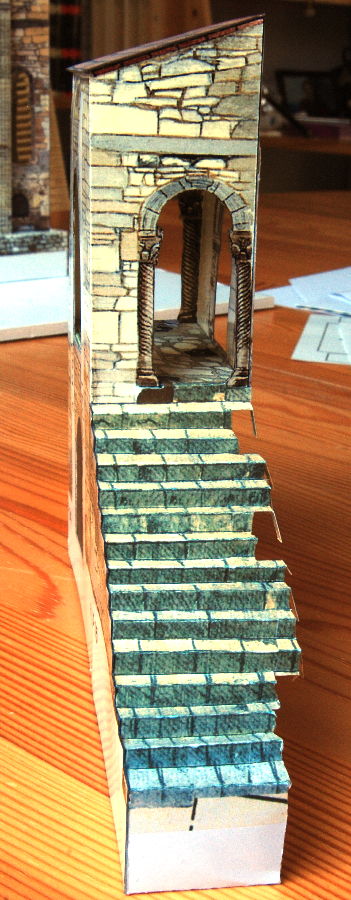
The western front with the entrance to the cellar chamber, and a view into the cellar vault. The central door vault did not fit well, the gray "collar" is an addition to hide the gap. |
|
|
The western cellar chamber with a floor inserted, and the eastern cellar chamber (the bath)- its floor will be the base plate of the model. |
|

|
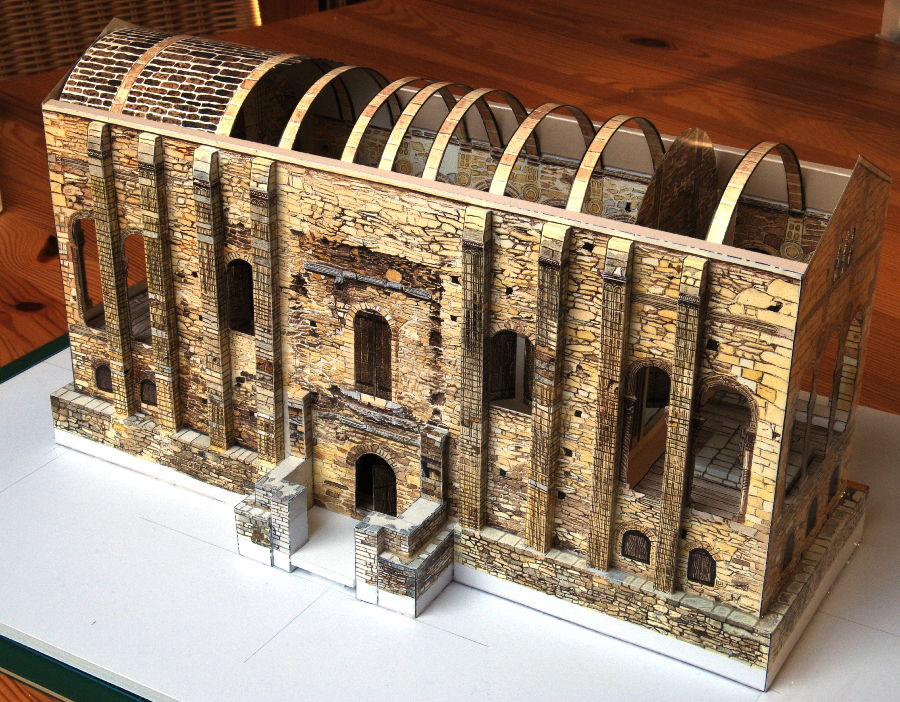
Top view of the model, mounted on its base plate. Note the reinforvement of the long eaves. I cut the cardboard for them from the huge cover envelope of the model.
To the right, the reinforcements in detail. The arches that indicate the ceiling are still missing; they will be glued into slots just below the reinforcement strips. |
|
|
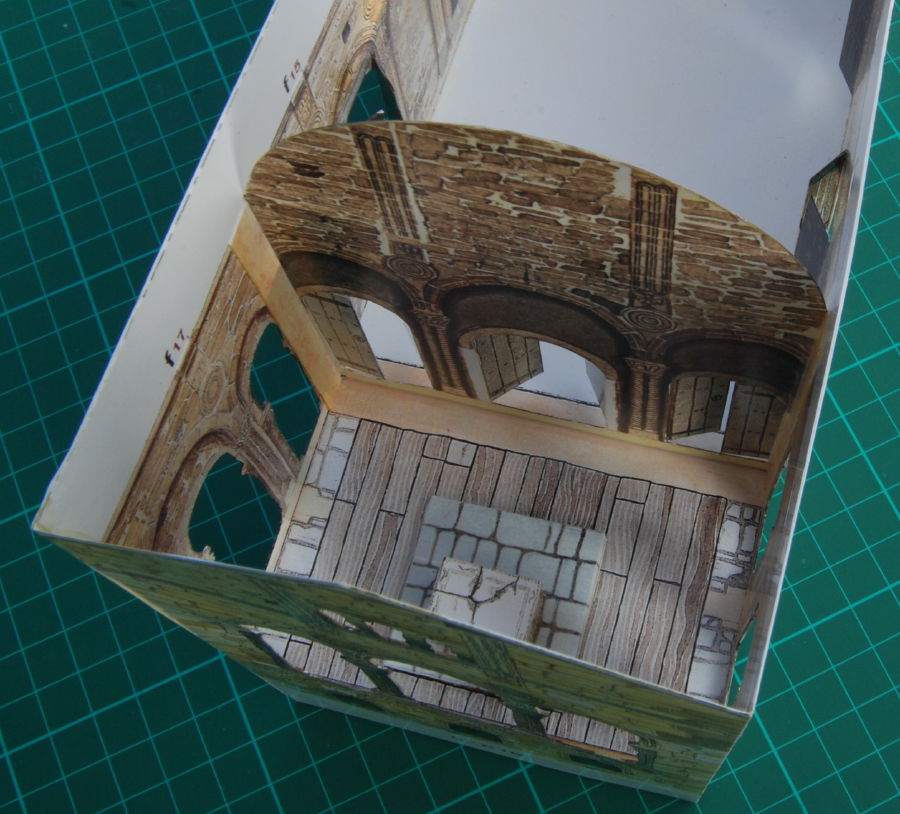
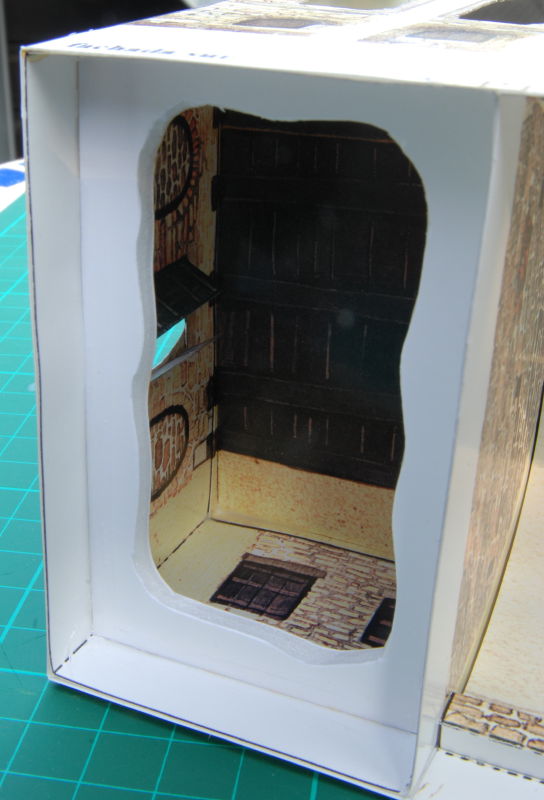
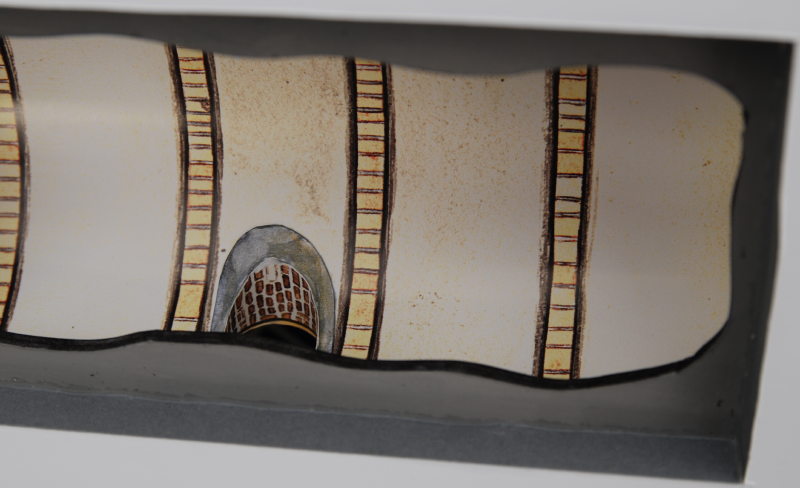
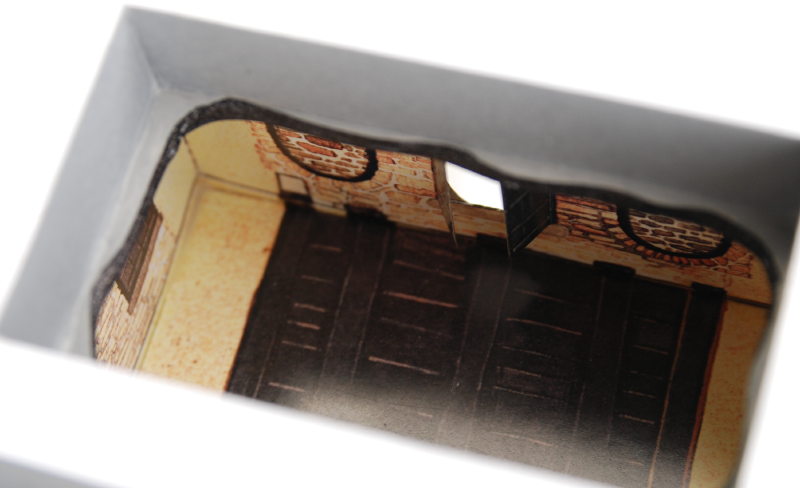
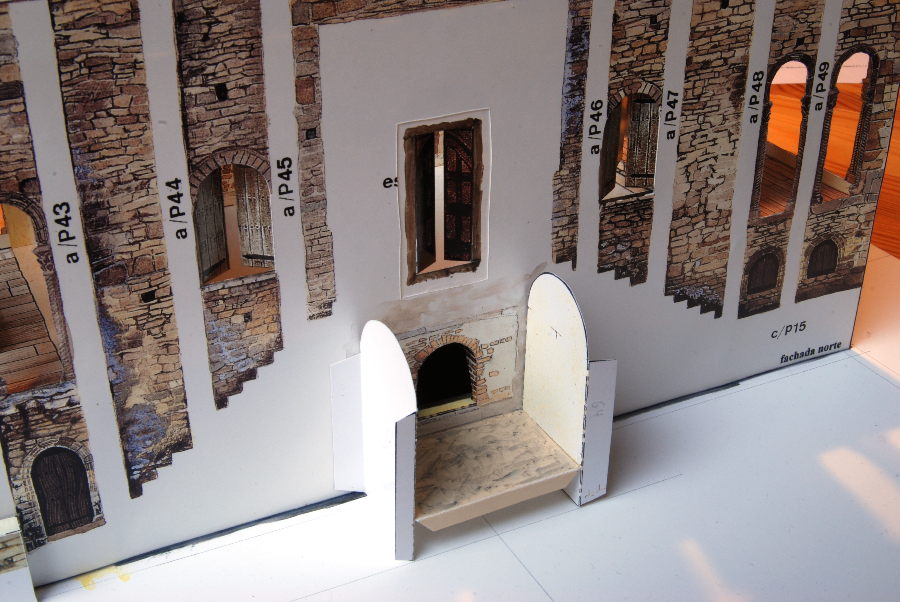
The cut-outs in the base plate with views of the central cellar and of the chamber. The church is on a slope, as you can see by the different floor levels of the basement rooms (and also from the outside contours). |

|
|
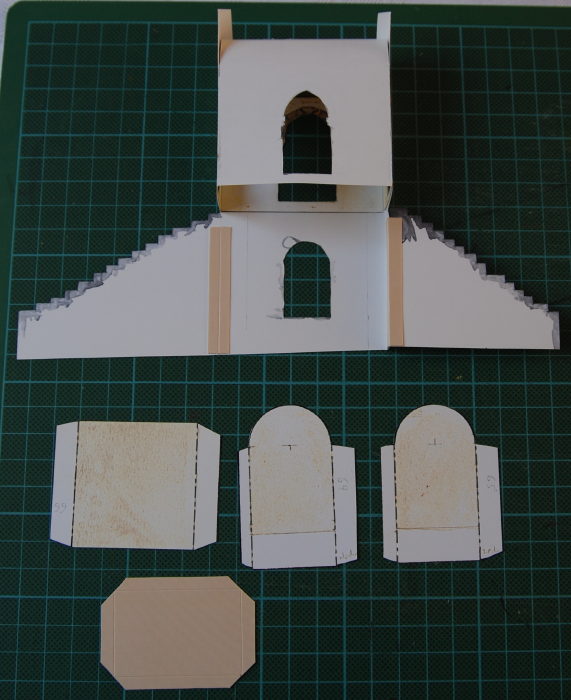
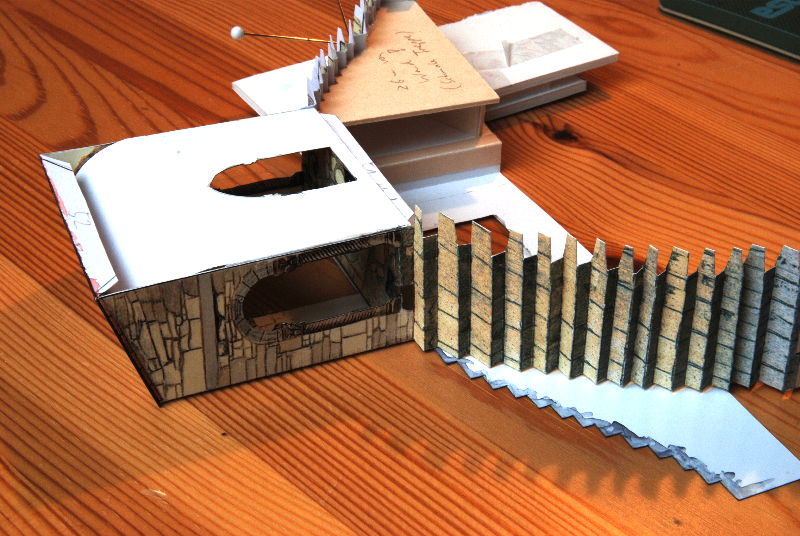
The northern staircase annexe. The left picture shows the original roof and first floor and my photoshopped replacements- the original parts would have made the annexe lozenge-shaped, which it is not. This would also have meant that both roof vaults would not have fit the annexe. |
|

|
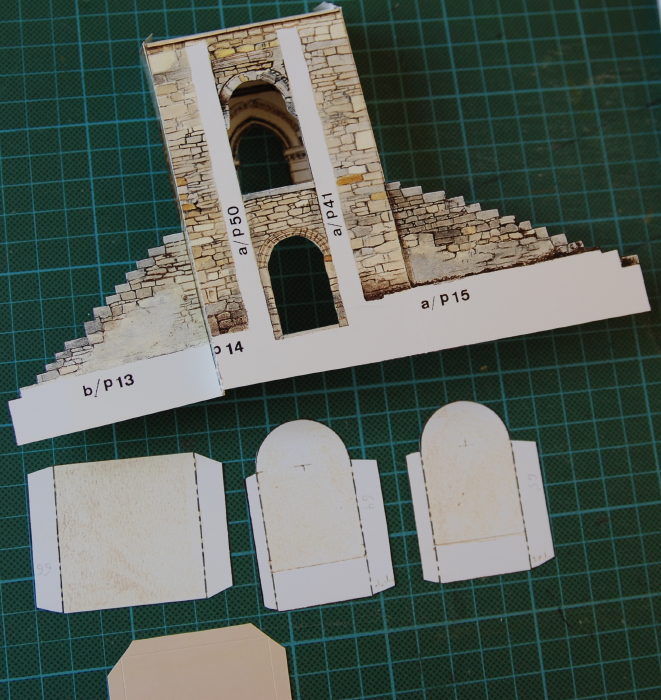
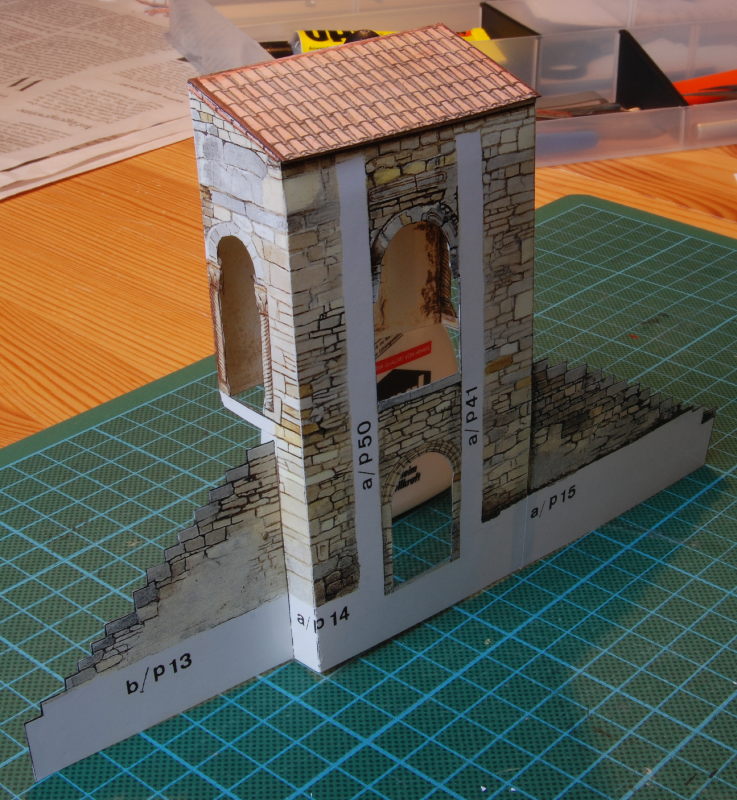
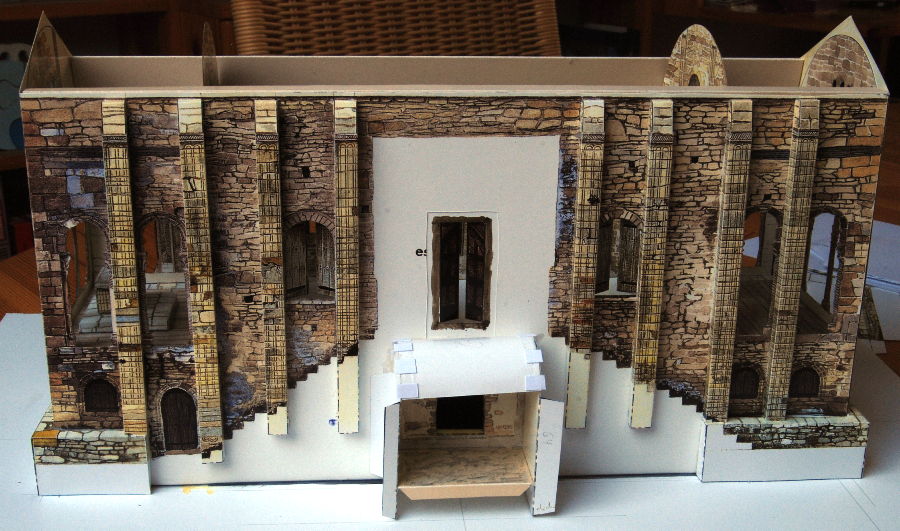
The same annexe from the front, with ground level entrance parts.
The right-side image shows the ruins of the southern entrance and the south-western base plinth. |
|
|
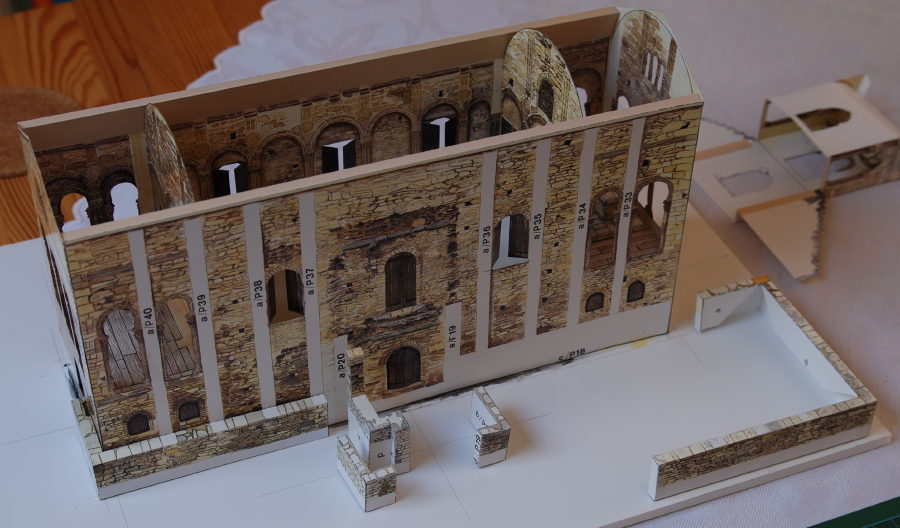
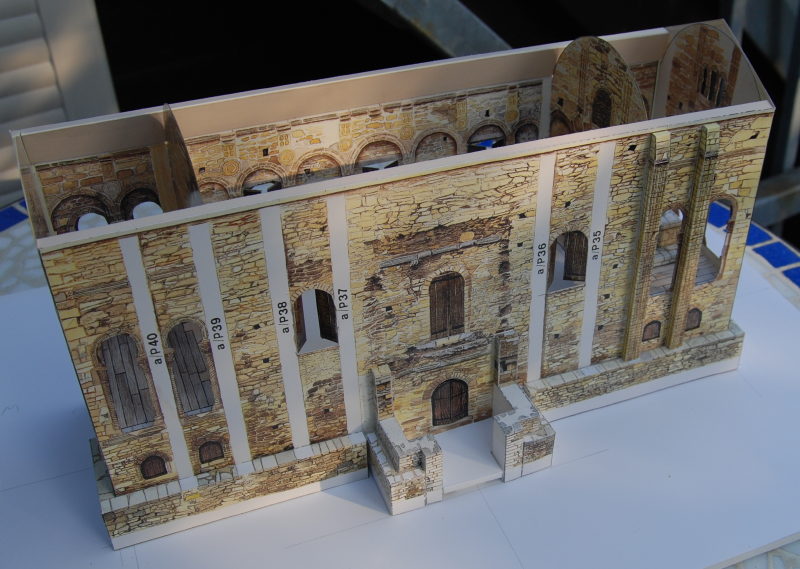
The same parts, plus the western part of the plinth, shortly before and shortly after the assembly. Two pillars have also been glued to the wall already. Nearly all pillars needed some shortening, but this is due to the fact that I limited any vertical adjustment by adding a baseplate to the model. |
|
|
The walls of the lower northern entrance, with a floor added by myself.
The complete rest of the entrance will be pre-assembled together with the stairs and glued to the wall and lower entrance in one piece. |

|
|
The entrance with the vaulted roof added, and the staircase with one of my self-made stairs already in place and reinforced and the other just fixed to the upper floor. |

|
|
Both stairs are in place, and the staircase is complete to be glued on. When adding reinforcements to the stairs take care to set them off far enough (6-7 mm) from the wall to allow the pillars to fit between the reinforcement an the wall! |
|
|
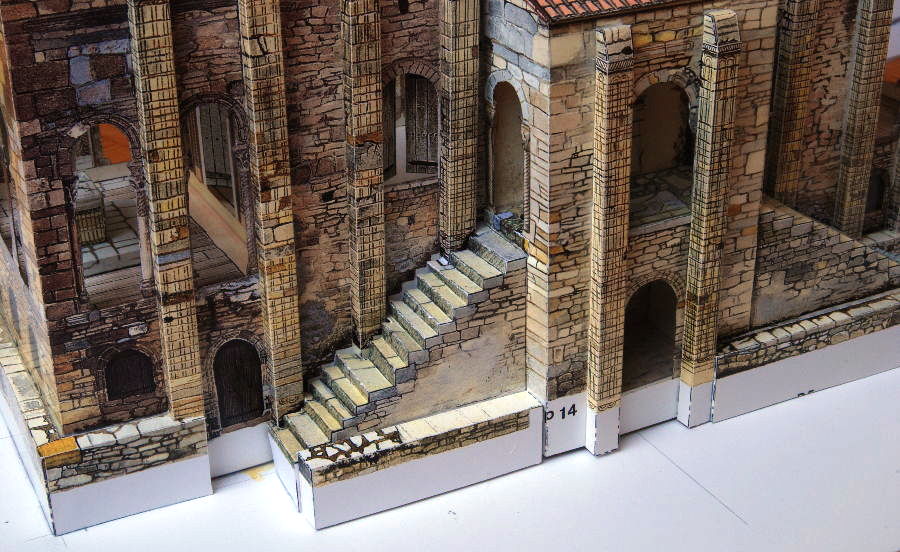
Side view of the stairs- the notches for the pillars and base plinth have been fitted after the pillars and plith had been added to the model, as you can see in the right-hand picture. |
|

|
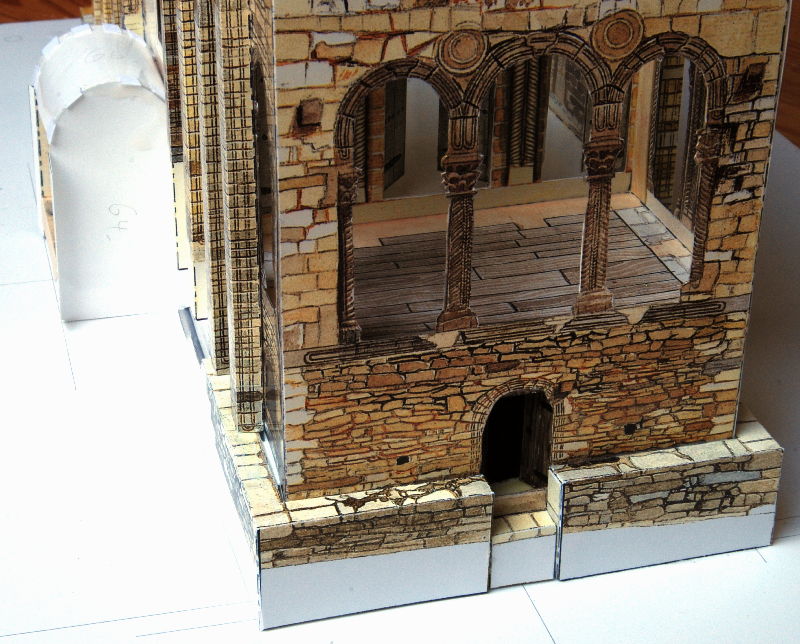
A close-up view of the western entrance. One of the small plinth wall faces to the side of the entrance was blank, I added a strip of brickwork left over from the stair construction.
And now the staircase hase been fitted and glued into place. |
|
|
Two more views of the staircase. Unfortunately there are some gaps between my staircase construction and the wall, but some colouring hides these gaps pretty well until you look at the model very closely. |
|
|
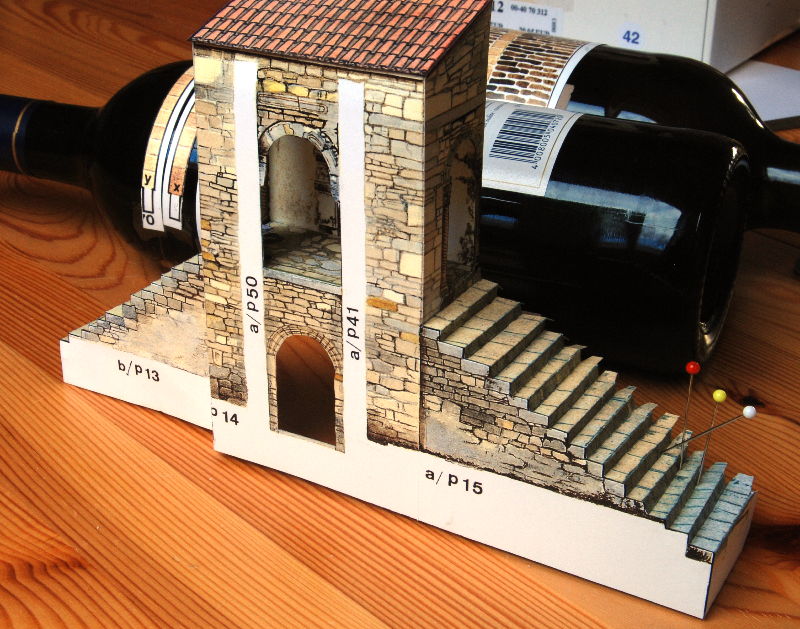
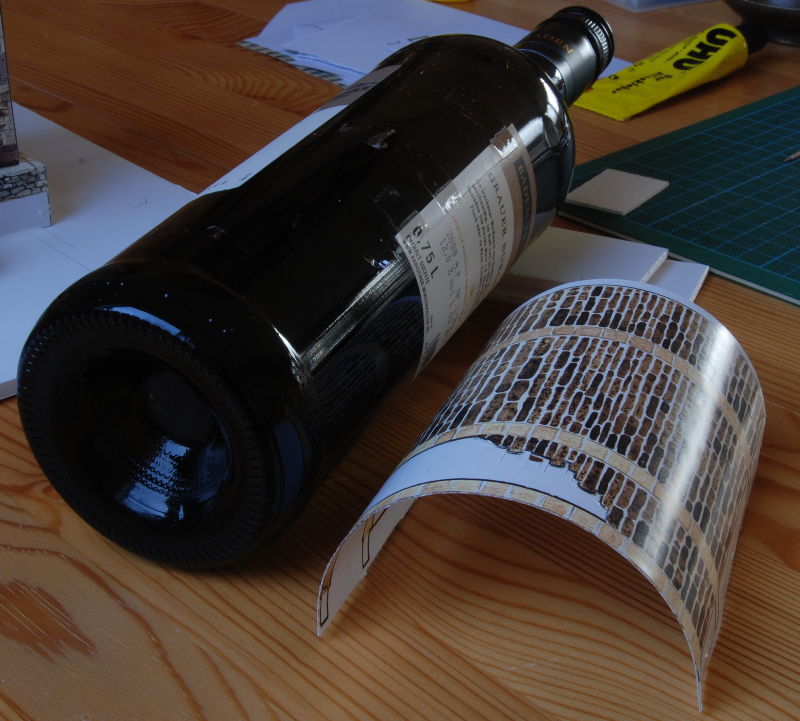
I formed the barrel vault and roof arches by glueing them back to back as instructed, but fixed them tightly around this excellent bottle of wine with some strips of adhesive for drying. This gave them a very permanent barrel shape. I cut the interior contours while the part was fixed on the bottle.
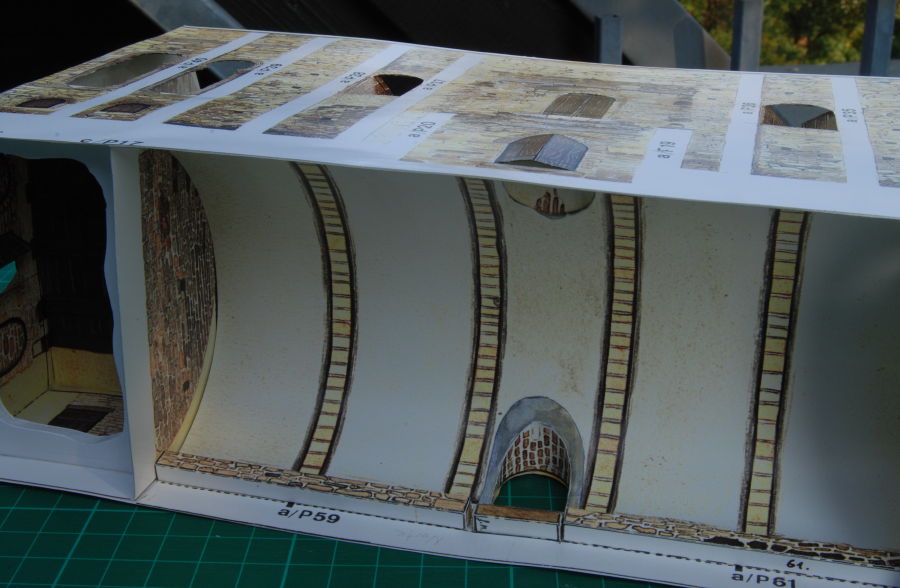
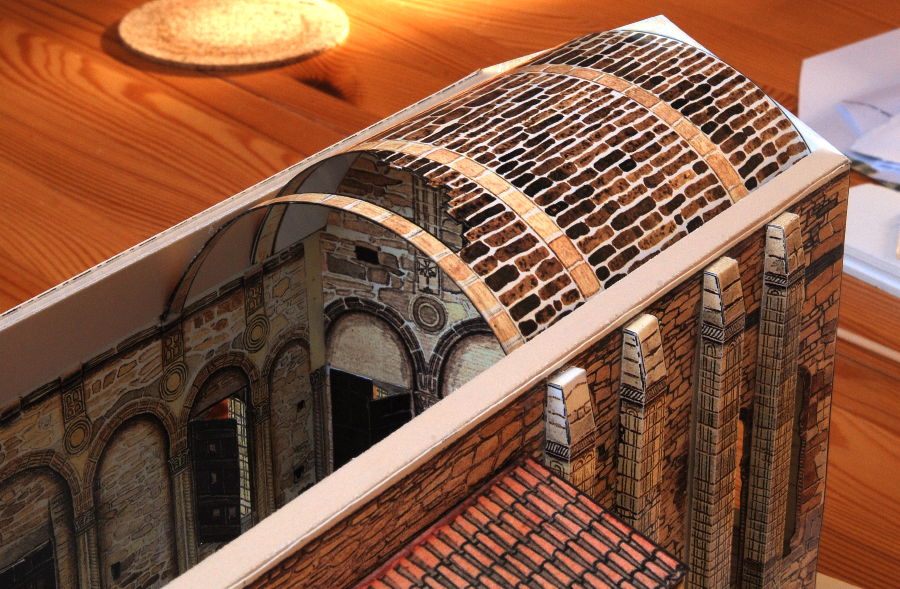
The barrel vault fitted to the building. Note how well it snugs up with the eave reinforcements. |
|
|
The building with the vault and arches in place. The missing plinth pieces around the staircase are now also in front. |
|
|
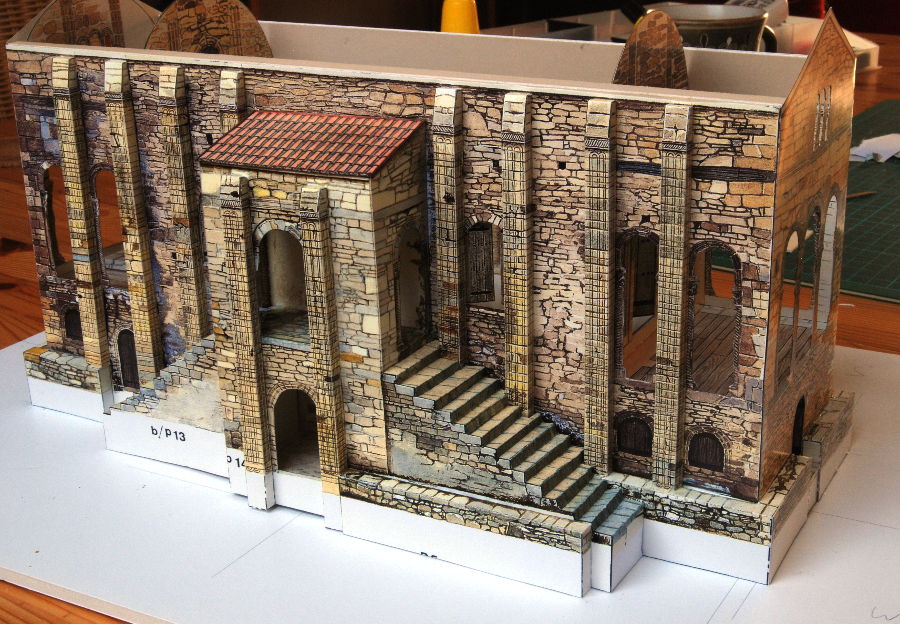
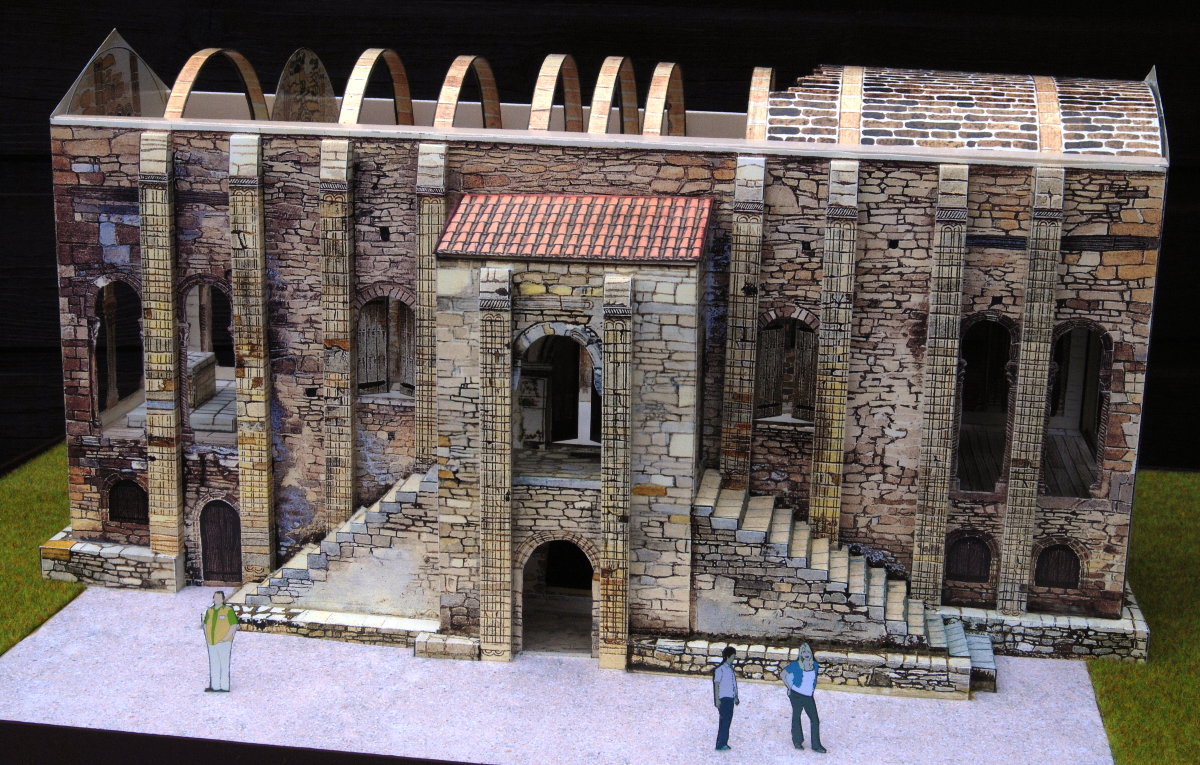
The completed southern entrance, with some terrain-level floor already fitted in.
Now I added some support for the terrain I wanted to add to the model. |
|

|
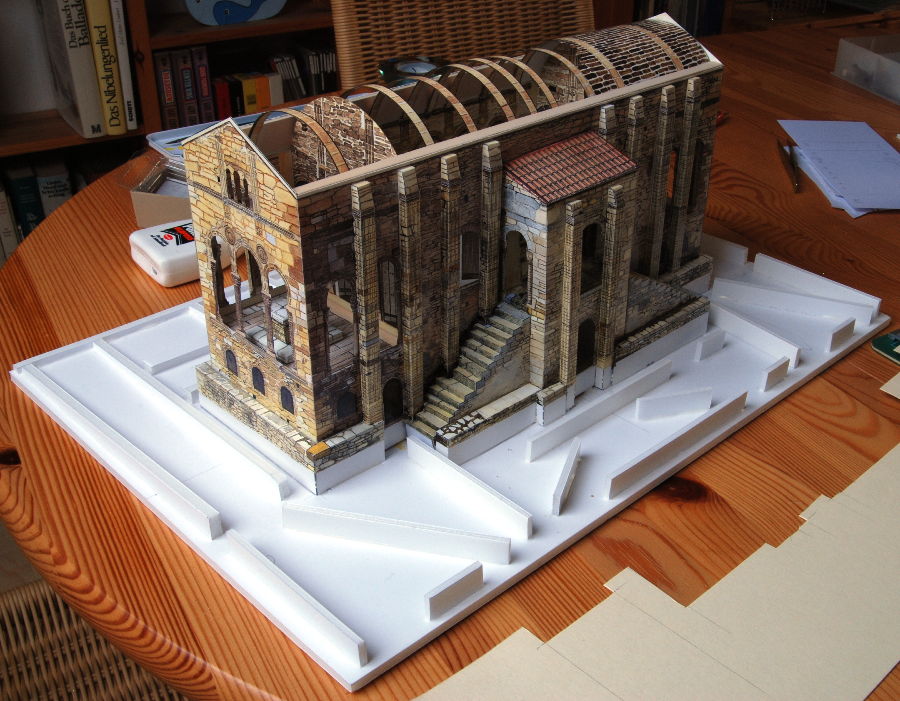
The completed model with some terrain added. I also added some "tourists" to show the scale (you may recognize Laura and Bryce from the Sketchup warehouse). I think the terrain adds a lot to the model. |

|

|
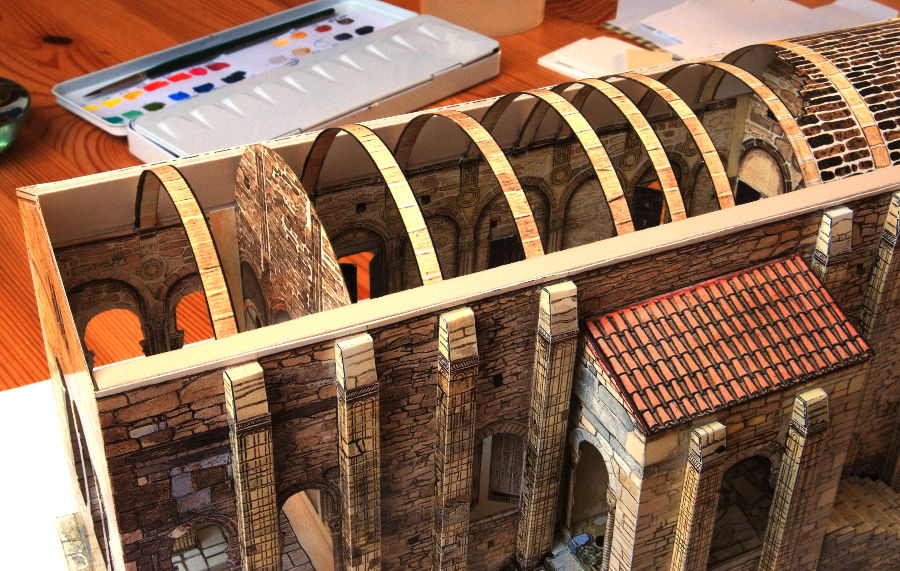
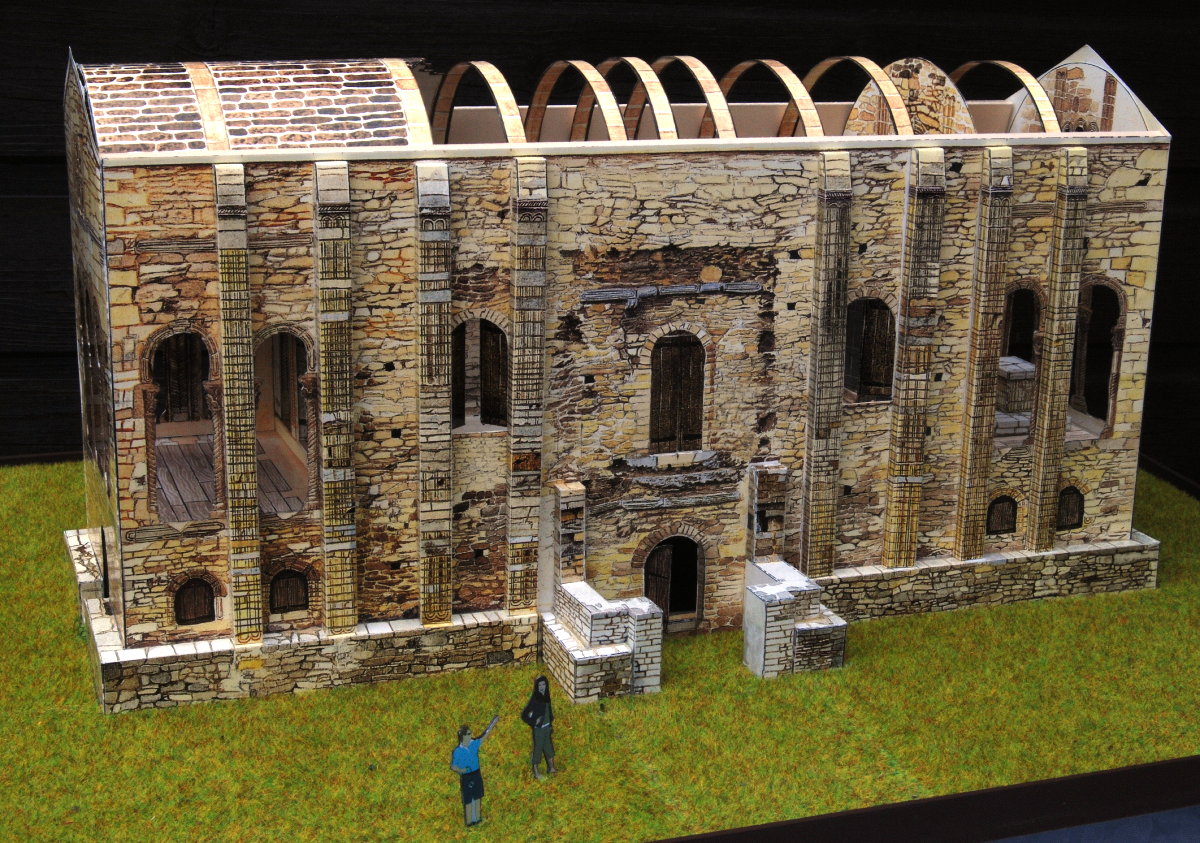
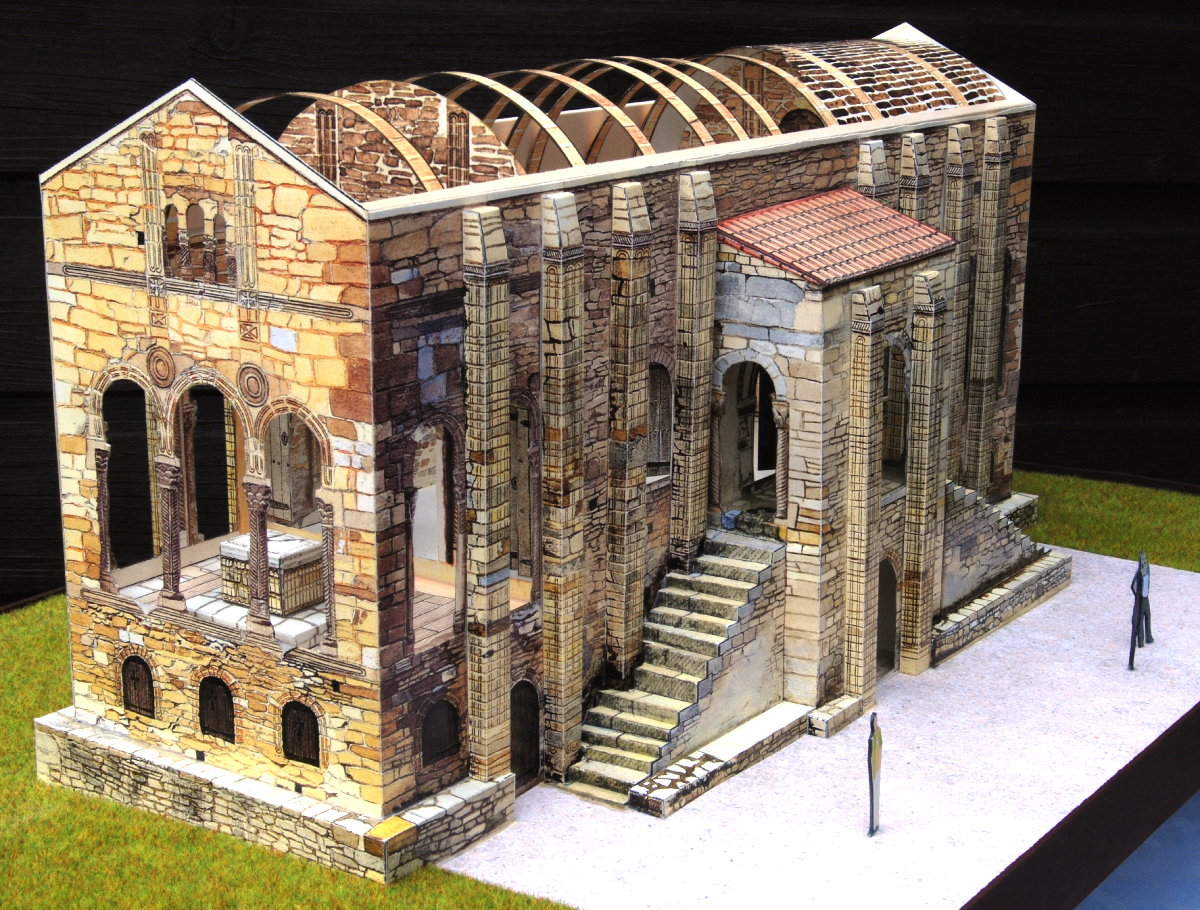
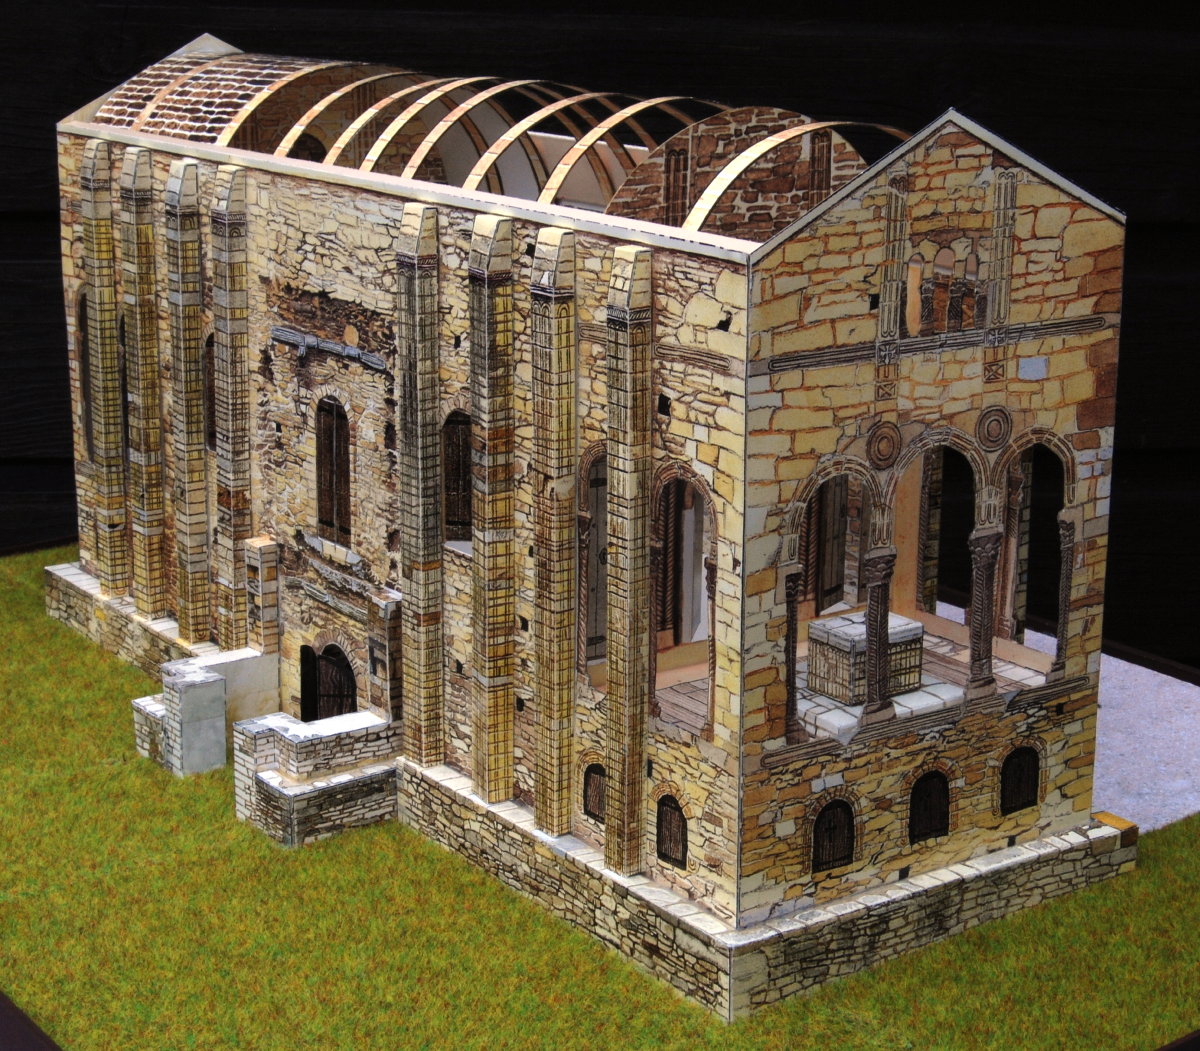
A view from the North-West, and the same view with the roof detached to show the vaulted ceiling and the interior. |
|
|
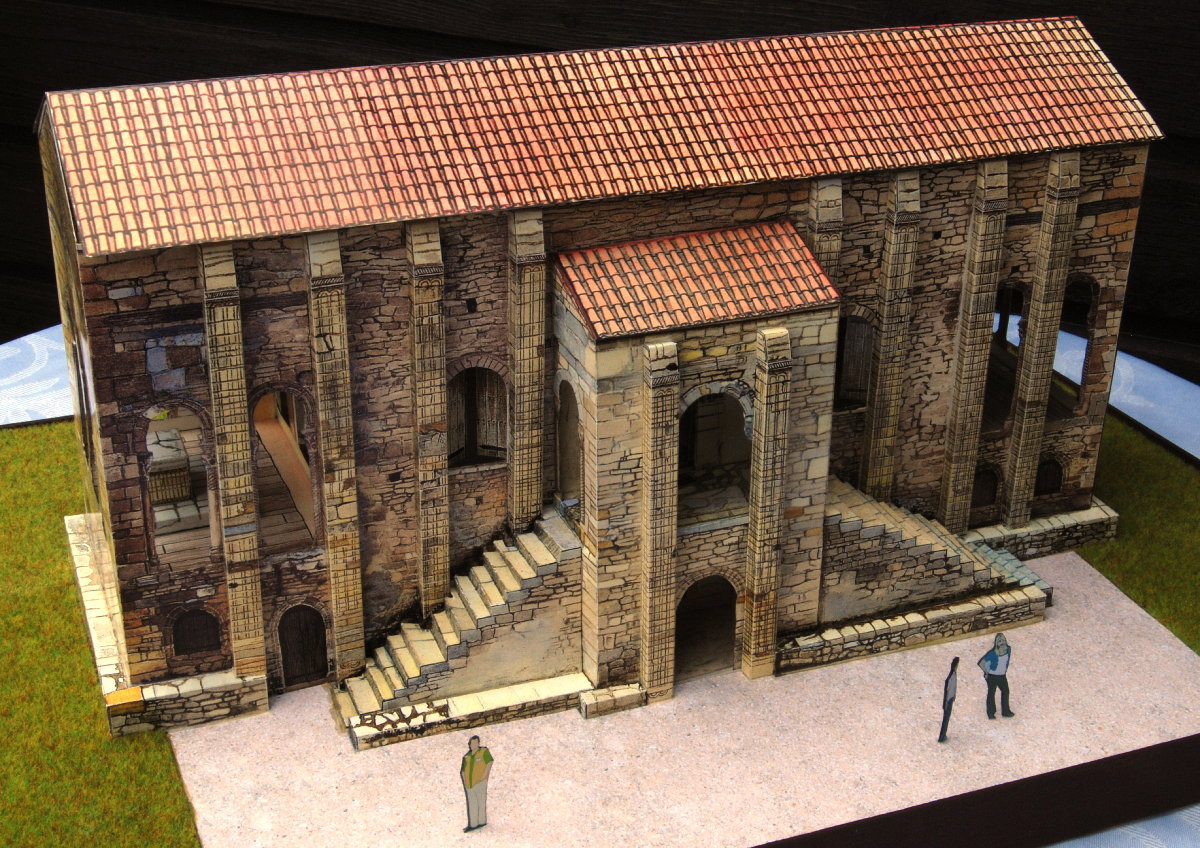
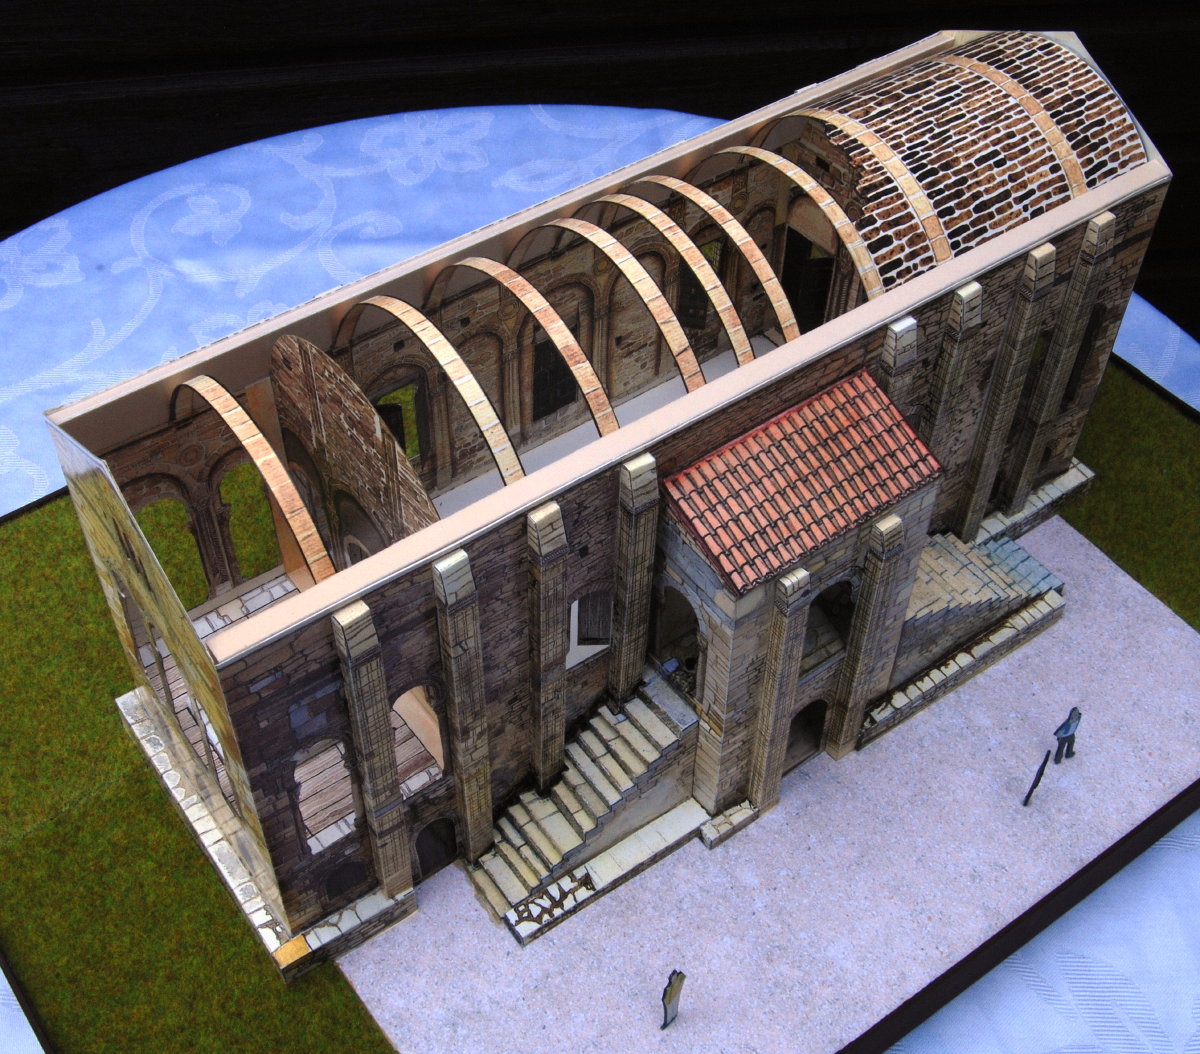
Some more views to show the complete model from different angles. |
|
|
And some more. |
|
|
And yet some more. Both the low-angle views and the top view show the beautiful details and the splendid graphics of this model particularly well. |
The following hints may help if you, in particular if do not speak Spanish (like me) and consequently have difficulties (as I had) reading the instructions:
The following text is an abbreviated rendering of the historical overview that comes with the model:
The "Moors", Muslim invaders from North Africa, invaded the Iberian peninsula in 711. Some Visigoths managed to maintain Christian kingdoms in the mountains of Northern Spain and sometimes even to beat the Islamic forces. In the rough terrain they could call their own they founded the kingdom of Asturias that covered what we now call Galicia, Asturias and Calabria. Among other towns, Oviedo was twice the capital of that kingdom; it was the seat of king Alfonso III who expanded the kingdom in the 9th century to the river Duero. His son, Ordono II, moved the capital to Leon, and the kingdom became known as Asturleonés from then on.
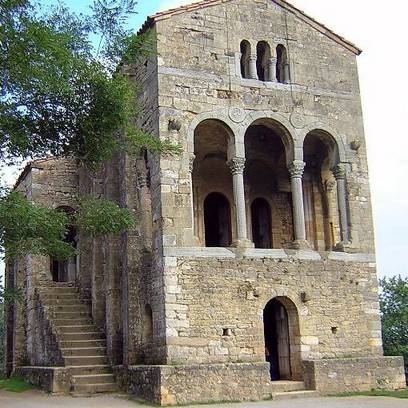
The kingdom left only a few churches and public buildings that are in a good state by today. One of them is the church Santa Maria del Naranco, built on the Southern slope of Mount Naranco, above the old capital Oviedo. It was built around 848 on orders of Ramiro I and once formed part of a greater palacial complex of which it and the nearby church of San Miguel de Lillo are the only surviving structures. The church was initially built for secular purposes, probably as the seat of the royal council, and only at Ramiro's death was consecrated and transformed into a church.
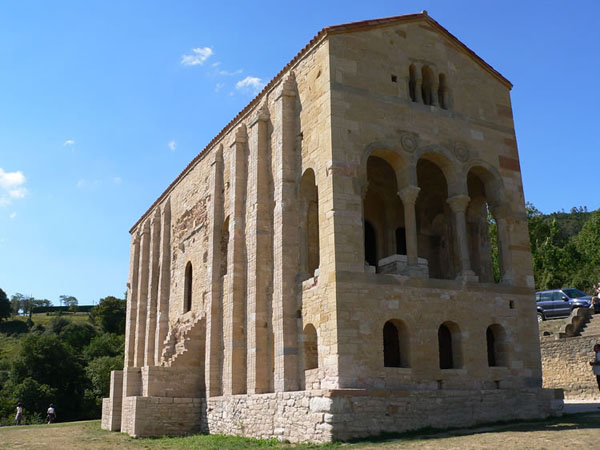
Here are some impressions of what the building looks like today:

The long Southern facade and the Western facade with the chamber entrance (click image to enlarge in new window)
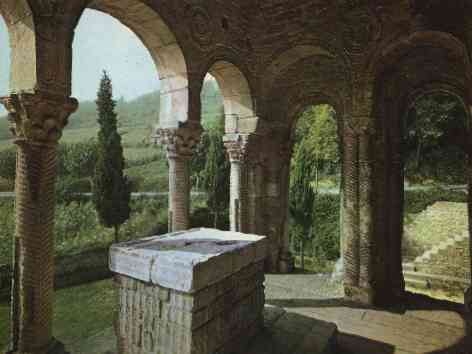
The Eastern "mirador" (bay) with the altar and the bath windows in the ground floor
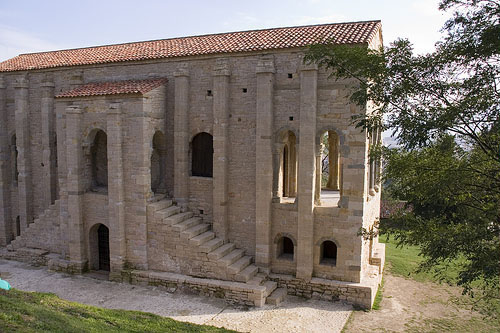
The long Northern facade with the stairs to the first floor
A view at the north-western stairs- the model has a design flaw there
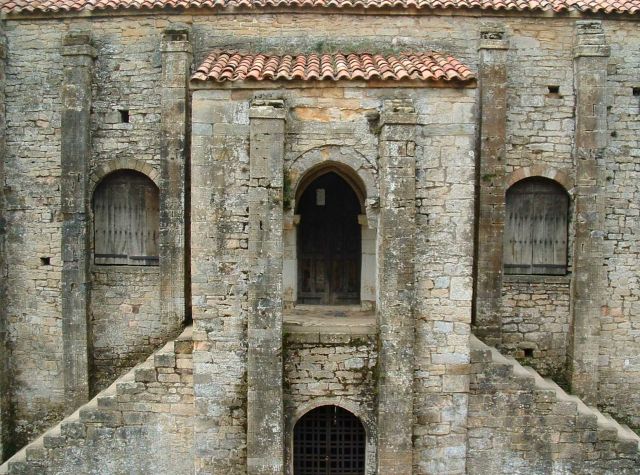
Close-up of the Northern facade and stairs
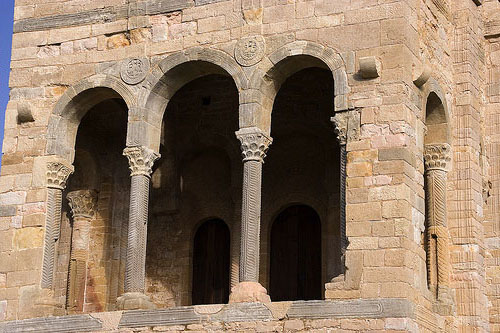
The Western "mirador" in detail
The altar room
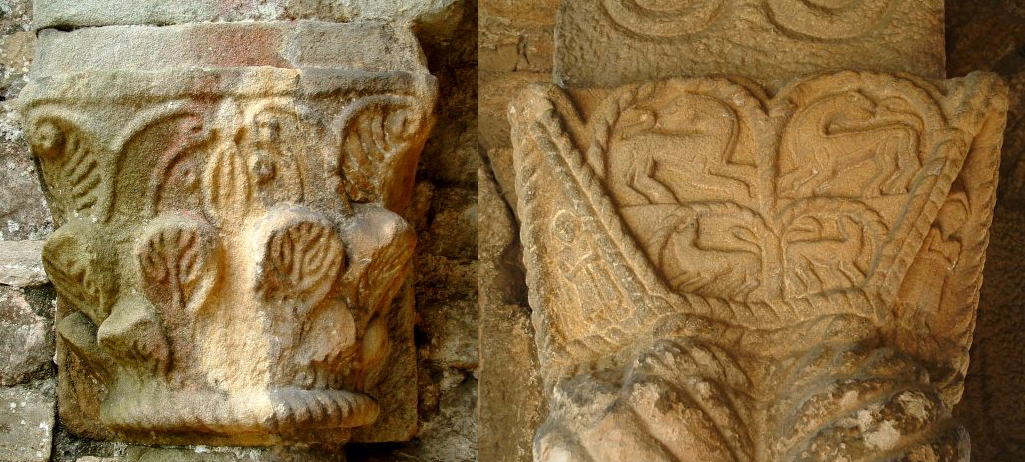
Two column capitels in a close-up view
And finally, some web links about Santa Maria del Naranco:
As the author of this page I take no expressed or implied responsibility for the content of external links; opinions expressed on such pages are not necessarily mine. The web space provider is not responsible for the contents of this page or any linked pages.
Written and published by Lutz Pietschker. Please send comments about technical problems to the
site master.
-Made with a Mac!-
, last change 2011-03-12